Azure Cognitive & Colab: Crafting Your First Sentiment Analysis Project

Introduction
In today’s data-driven world, sentiment analysis is a powerful tool that allows us to understand the emotions behind texts. Whether you’re analyzing customer feedback, social media conversations, or any textual data, sentiment analysis can provide valuable insights. This tutorial will guide you through setting up Azure’s Cognitive Services to perform sentiment analysis directly in Google Colab.
Prerequisites
Before we dive into the step-by-step guide, ensure you have the following:
- An active Azure account. If you don’t have one, sign up for a free account at Azure’s official website.
- Basic familiarity with Python & Google Colab.
Google Colab Full Code:
You should active the Cognition service in your Azure Account:
Step-by-Step Guide
Step 1: Activate Azure Cognitive Service
- Navigate to Azure Portal: Go to the Azure Portal by following this link: Activate Azure Cognitive Service.
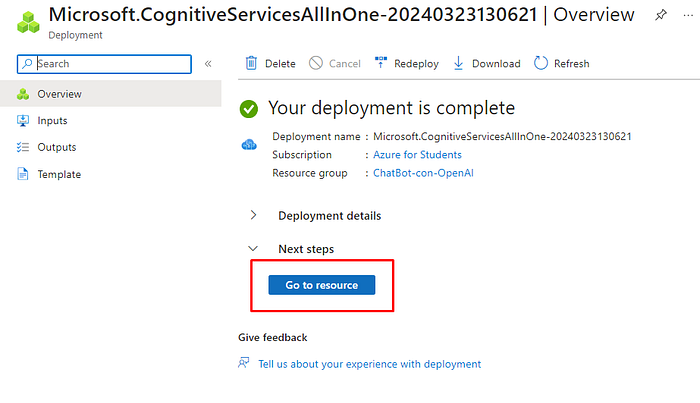
- Review and Create: Click on “Review and Create”. You will be directed to a page to review your selection.

Click on Review and Create

You will see this page:
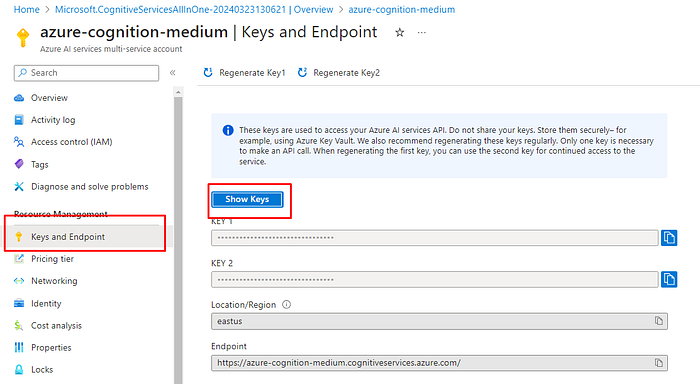
- Retrieve Your Keys: Show your keys, copy one of them and your endpoint. These credentials are crucial for accessing the Cognitive Services API.
Step 2: Set Up Your Colab Environment
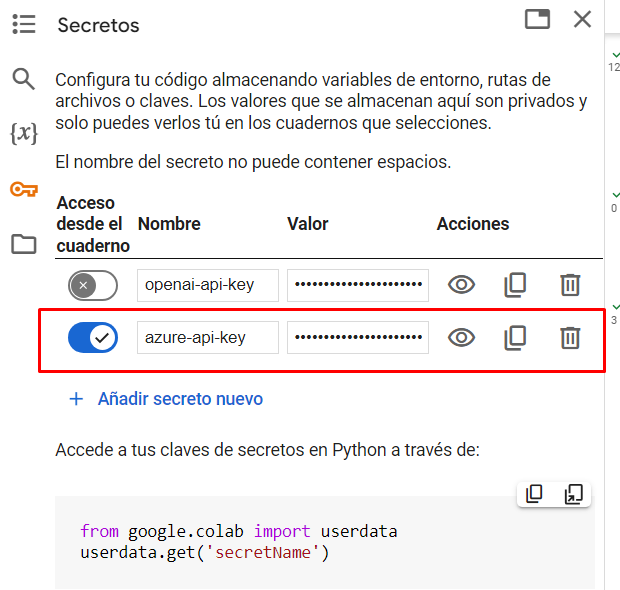
- Set Up API Key Retrieval: Instead of hard-coding your credentials, use Colab’s secure way to store and access your API key.
- Install Necessary Libraries: Copy and execute the following command in your Google Colab notebook to install Azure AI Text Analytics and Cognitive Services Vision Face libraries.
# Install Azure AI Text Analytics library.
# This library allows us to interact with Azure's text analytics services, including sentiment analysis.
!pip install azure-ai-textanalytics- Import Libraries and Set Credentials: Replace
<your-api-key>and<your-endpoint>with your actual Azure API key and endpoint.
# Import Colab's userdata module to securely retrieve the Azure API key stored in Colab's environment.
from google.colab import userdata
# Retrieve your stored Azure API key using Colab's secure environment. Replace 'azure-api-key' with the actual name you used to store your API key.
key = userdata.get('azure-api-key')
# Set your Azure Cognitive Service endpoint. Replace `<your-cognitive-service-name>` with the name of your Cognitive Service.
# This endpoint is used to connect your code with the Azure service you've set up.
endpoint = "https://<your-cognitive-service-name>.cognitiveservices.azure.com/"
# Example of setting the endpoint: endpoint = 'https://azure-cognition-medium.cognitiveservices.azure.com/'Step 3: Analyze Sentiments
- Initialize the Client: With your Azure credentials, set up the client for text analytics.
from azure.ai.textanalytics import TextAnalyticsClient
from azure.core.credentials import AzureKeyCredential
from azure.ai.textanalytics import TextAnalyticsClient
from azure.core.credentials import AzureKeyCredential
# Initialize the Text Analytics client with your endpoint and API key.
# This client will be used to send requests to Azure's Cognitive Services for text analytics.
text_analytics_client = TextAnalyticsClient(endpoint=endpoint, credential=AzureKeyCredential(key))# Define the texts you want to analyze. These can be any string of text that you want to analyze the sentiment of.
documents = [
"The delivery was prompt and the package arrived in perfect condition. Highly recommend!",
"Unfortunately, the product did not meet my expectations. It broke after a week."
]- Detect Language and Analyze Sentiment: The API determines each document’s language and evaluates its sentiment.
# Detect the language of the documents. This is useful for ensuring accuracy in sentiment analysis,
# as it allows the service to apply language-specific models.
language_result = text_analytics_client.detect_language(documents=documents)
# Retrieve the primary language of the second document in your list as an example.
# The primary language is identified by its ISO 639-1 name, such as 'en' for English.
language = language_result[1].primary_language.iso6391_name
# Analyze the sentiment of the documents using the detected language for more accurate analysis.
# This returns a detailed analysis of the sentiment expressed in each document, categorizing them into 'positive', 'neutral', or 'negative'.
response = text_analytics_client.analyze_sentiment(documents=documents, language=language)
# Print the results of the sentiment analysis, including the overall sentiment and confidence scores for each sentiment category.
for document in response:
print(f"Sentiment: {document.sentiment}")
print(f"Overall Scores: positive={document.confidence_scores.positive:.2f} "
f"neutral={document.confidence_scores.neutral:.2f} "
f"negative={document.confidence_scores.negative:.2f}")
print("--------")Conclusion
Congratulations on completing this tutorial! You’ve unlocked a new level of insight with sentiment analysis using Azure Cognitive Services. The skills you’ve acquired today are just the starting point. Imagine the potential applications: from analyzing customer feedback to uncovering trends in social media sentiments. Dive deeper, experiment with your datasets, and see where this journey takes you. Happy analyzing, and here’s to the valuable insights you’ll discover!
