Create a RAG ChatBot with GCP using the Vertex AI Platform
Introduction
A RAG (Retrieval-Augmented Generation) ChatBot is a chatbot that can quickly search through a large data source to find the best information to answer your questions, and then it responds in a way that’s easy to understand, almost like having a conversation with a knowledgeable friend.

It combines two key techniques to deliver an exceptionally informative and user-friendly experience:
- Retrieval: This is the chatbot’s ability to act like a super-searcher. It scans through massive amounts of data — think of it as having the ability to quickly flip through an endless number of books to find exactly what you’re looking for. The chatbot does this using something called ‘vectors’. In simple terms, vectors are like unique markers for every piece of information, helping the chatbot to match your question with the most relevant answers from its data source.
- Generation: Once the chatbot finds this information, it’s time for the second technique. Generation is all about communication. The chatbot takes the information it has found and turns it into a response that’s easy to understand. It’s like having a friend who not only knows a lot but is also great at explaining things in a simple, clear way.
In this tutorial, you’ll learn how to create your own RAG ChatBot using Google Cloud Platform (GCP) and Vertex AI. This process will not only enhance your understanding of AI and chatbots but also give you a hands-on experience in building a cutting-edge technology tool. Let’s dive in!
- Step 1: Go to the GCP Console and Create a new Proyect
GCP Console: https://console.cloud.google.com/
Create New Proyect: https://console.cloud.google.com/projectcreate

- Step 2: Select your Project

- Step 3: Search for the Gen Builder Service

- Step 4: Configure your Billing settings

- Step 5: If its your first time using GCP you will have 300$ free credit


- Step 6: Enable the Vertex AI API

- Step 7: In the ‘Select app type’ panel lets select ‘Chat’

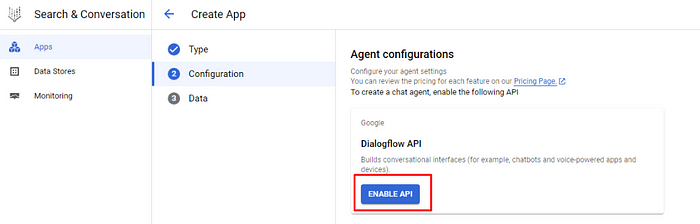
- Step 8: Now we need to Enable the DialogFlow Api to be able to use an intuitive interface to build the ChatBot, write an Name for the ChatBot agent name, select the region and then Continue

- Step 9: Now we need to create a Data Store
Data Store refers to a centralized repository where data is stored and managed

- For this tutorial we will use a Cookbook of Peruvian Food, so lets select Cloud Storage

- Step 10: Lets select File and Unstructured Documents

- Step 11: When you click “Browse” if will show the following panel:

We will need to create a Bucket to storage our files, complete all fields and then click to ‘Create’


- Step 12: In a different TAB lets search for the ‘Cloud Storage’ service

You will see your bucket recently created, click in your bucket

Inside your bucket lets upload the Cookbook PDF

- Step 13: Now lets return to your data store configuration for your ChatBot, and lets select the CookBook PDF and Continue


And finish the configuration of the Data Store

- Step 14: Now lets click the ‘Create’ button to finish our ChatBot configuration

Lets click Data Stores and then the Name of the Data Store
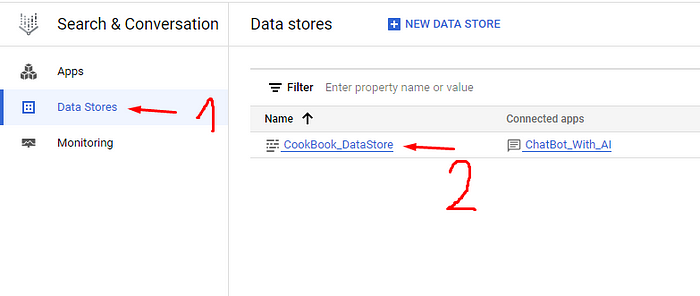
And see if the file has been succesfully imported

- Step 15: Now in the tab of ‘Apps’ lets click in the name of the Agent

It will display the DialogFlow CX, a chatbot builder, so now lets click ‘Test Agent’ to test our ChatBot, also verify that the agent and the language has been selected


As we see our chatbot is working and its using the PDF as data source.
Thanks for following this tutorial :)
